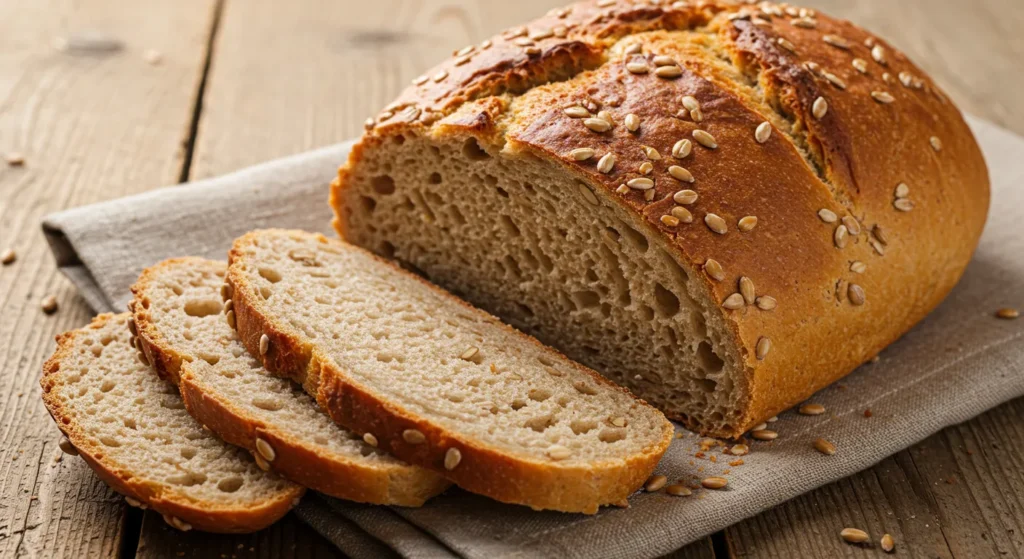
Few things compare to the comforting aroma of freshly baked bread wafting through your home, especially when it’s a honey grain bread recipe. This sweet and wholesome bread combines the natural sweetness of honey with the hearty texture of grains, creating a loaf that’s as nutritious as it is delicious. Whether you’re a seasoned baker or new to bread-making, this step-by-step guide will help you master this delightful recipe.
The origins of honey bread recipes trace back centuries, with honey being a prized natural sweetener. This recipe combines tradition with modern simplicity, resulting in a loaf that’s perfect for breakfast, sandwiches, or a quick snack. The subtle sweetness pairs beautifully with butter, jam, or even savory spreads.
Why does this honey grain bread recipe work so well? It’s all in the balance. The honey lends moisture and sweetness, while the grains add texture and nutrition. Whether you’re making a classic honey wheat bread recipe or customizing it with seeds and nuts, this versatile bread is sure to become a family favorite.
Quick Recipe Card
Honey Grain Bread Recipe
Prep Time: 20 minutes
Cook Time: 35 minutes
Total Time: 55 minutes
Difficulty Level: Easy
Servings: 10-12 slices
Nutritional Information (Per Slice):
- Calories: 180
- Protein: 5g
- Carbohydrates: 30g
- Fiber: 3g
- Sugar: 7g
- Fat: 4g
Equipment Needed
- Large mixing bowl
- Measuring cups and spoons
- Dough scraper
- Stand mixer with dough hook (optional)
- Loaf pan (9×5-inch)
- Kitchen towel
- Cooling rack
Ingredients
- 3 cups (375g) whole wheat flour
- 1 ½ cups (180g) all-purpose flour
- 1 ½ cups (360ml) warm water (110°F/43°C)
- 2 ¼ tsp (7g) active dry yeast
- ¼ cup (60ml) honey
- 1 tsp salt
- 3 tbsp (45ml) olive oil or melted butter
- ½ cup (60g) rolled oats or mixed grains
Instructions
- Activate Yeast: Mix warm water and honey in a bowl. Sprinkle yeast on top and allow it to sit for 5-10 minutes until it becomes frothy.
- Mix Dough: In a large bowl, combine flours, salt, and grains. Gradually add the yeast mixture and oil. Mix until a shaggy dough forms.
- Knead Dough: Knead by hand for 8-10 minutes or use a stand mixer for 5-6 minutes until smooth and elastic.
- First Rise: Place dough in a greased bowl, cover with a towel, and let it rise for 1-1.5 hours or until doubled in size.
- Shape Dough: Punch down the dough, shape it into a log, and place it into a greased loaf pan.
- Second Rise: Cover and let rise for 30-40 minutes until it reaches the pan’s rim.
- Bake: Preheat oven to 375°F (190°C). Bake for 30-35 minutes until golden brown and hollow-sounding when tapped.
- Cool: Transfer to a wire rack to cool before slicing.
Ingredient Deep Dive
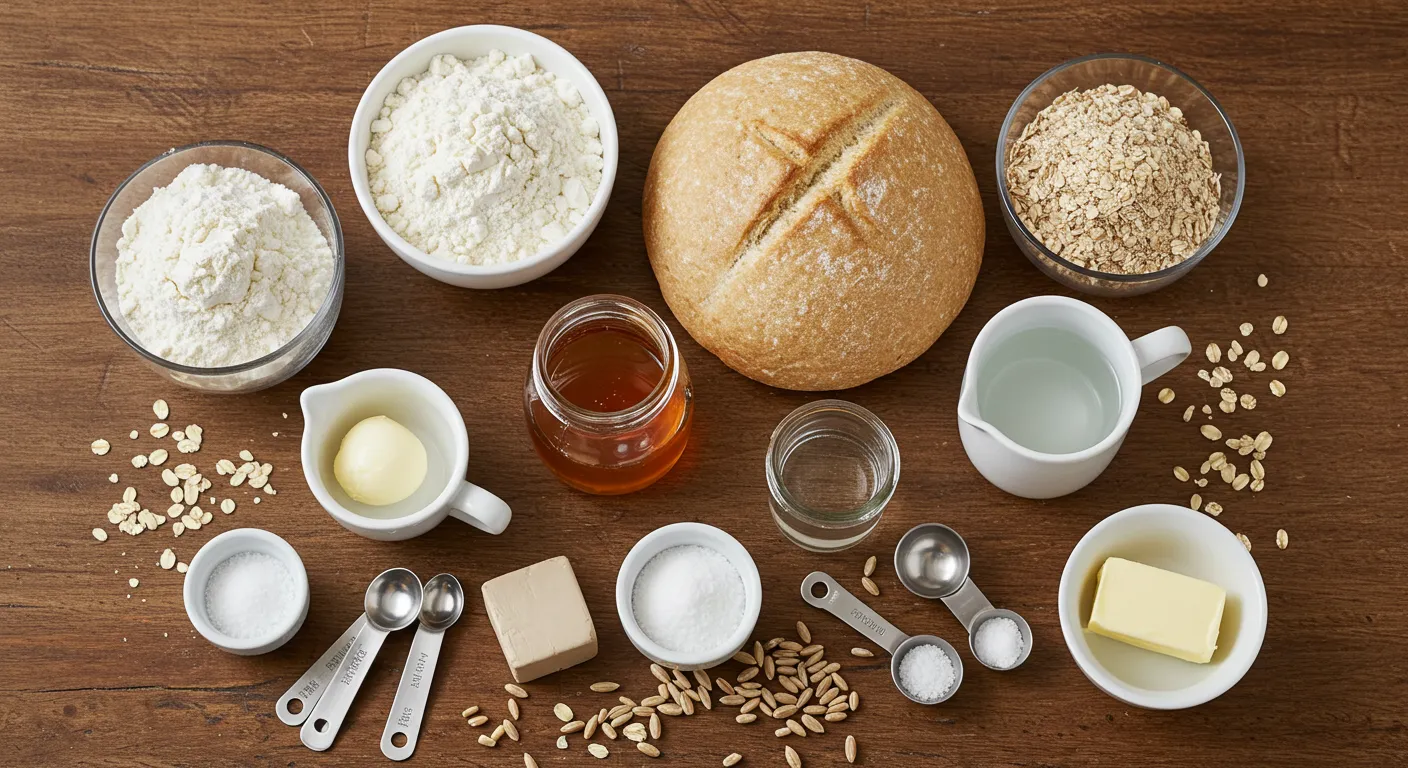
Each ingredient in this honey grain bread recipe plays a vital role in creating its delightful flavor, texture, and nutritional benefits. Let’s explore them in detail!
Whole Wheat Flour
- Why it’s important: Whole wheat flour adds a hearty texture, earthy flavor, and boosts the fiber content of this bread.
- Substitution: You can replace half of it with spelt or rye flour for a nuttier taste.
- Tip: Make sure to use fresh whole wheat flour to avoid a bitter aftertaste.
All-Purpose Flour
- Why it’s important: Balances the density of whole wheat flour to create a softer crumb in this honey bread recipe.
- Substitution: If you prefer, bread flour can enhance the chewiness further.
Honey
- Why it’s important: Adds natural sweetness and moisture while giving the bread a golden crust.
- Substitution: Maple syrup or agave nectar work well if you’re out of honey.
- Did You Know? Using local honey can enhance the bread’s flavor profile subtly based on your region’s floral sources.
Warm Water
- Why it’s important: Activates the yeast and hydrates the flour to form the dough.
- Temperature Tip: Keep the water at 110°F (43°C); too hot can kill the yeast, while too cold will slow fermentation.
Active Dry Yeast
- Why it’s important: This leavening agent gives the bread its light and airy structure.
- Substitution: Instant yeast can be used but reduces the proofing time slightly.
Salt
- Why it’s important: Enhances the flavor and controls yeast activity during fermentation.
Rolled Oats or Mixed Grains
- Why it’s important: Add texture, nutritional value, and a rustic charm to this honey grain bread recipe.
- Customizable Option: Sunflower seeds or chia seeds can be mixed in for added crunch.
Olive Oil or Butter
- Why it’s important: Provides tenderness to the bread and prevents it from drying out.
- Substitution: Coconut oil works well for a slight tropical hint.
Storage Tips
- Unbaked Dough: You can refrigerate the dough after the first rise for up to 24 hours. Bring it to room temperature before shaping and baking.
- Baked Bread: Store in an airtight container at room temperature for 3 days or freeze for up to 3 months.
- Reheating Tip: Toast a frozen slice for a quick snack that tastes freshly baked!
This honey wheat bread recipe ensures flexibility and allows you to create a wholesome, homemade loaf to fit any dietary needs.
Equipment Needed
To ensure your honey grain bread recipe turns out perfectly, having the right equipment is key. Here’s what you’ll need and why each item is important:
Mixing Bowls
- Why it’s essential: Used for combining ingredients and proofing the dough.
- Alternative: Large food-safe plastic containers work for proofing.
Measuring Cups and Spoons
- Why it’s essential: Accurate measurements are critical for consistent results.
- Pro Tip: Use a digital scale for even more precision, especially when weighing flours.
Wooden Spoon or Dough Hook
- Why it’s essential: Ideal for mixing the dough before kneading.
- Upgrade: A stand mixer with a dough hook attachment saves time and effort.
Kitchen Thermometer
- Why it’s essential: Ensures water is at the perfect yeast-activating temperature (around 110°F/43°C).
- Additional Use: Test the bread’s internal temperature when baking; aim for 190°F (88°C).
Clean Kitchen Towel or Plastic Wrap
- Why it’s essential: Covers the dough during proofing to prevent it from drying out.
Loaf Pan or Baking Sheet
- Why it’s essential: Shapes the bread for uniform baking.
- Tip: For a rustic look, bake the bread freeform on a baking stone.
Bench Scraper or Spatula
- Why it’s essential: Helps divide and shape the dough easily.
Wire Rack
- Why it’s essential: Allows the bread to cool evenly and prevents a soggy bottom.
Optional: Pastry Brush
- Why it’s essential: Great for brushing honey or butter over the loaf post-baking for added shine and flavor.
Budget vs. Premium Options
- Mixing Bowls: Stainless steel bowls are durable and affordable, while ceramic bowls offer aesthetic appeal.
- Loaf Pan: Opt for non-stick pans for ease or invest in heavy-duty metal for longevity.
With these tools, you’ll be fully prepared to craft your honey grain bread recipe with ease.
Step-by-Step Instructions
Follow these detailed steps to create your own honey grain bread recipe. Each stage is designed to ensure a fluffy, flavorful loaf with the perfect balance of sweetness and grainy texture.
1. Prepare the Ingredients
- Gather all your ingredients for the honey grain bread recipe.
- Verify the freshness and activity of your yeast by dissolving it in warm water mixed with honey.
- Tip: The water should be around 110°F (43°C) to activate the yeast properly.
2. Mix the Dough
- In a large bowl, combine whole wheat flour, oats, and salt thoroughly.
- In a separate bowl, mix the warm water, honey, and yeast until bubbles form, indicating activation.
- Gradually introduce the wet ingredients into the dry mixture.
- Slowly add the all-purpose flour, stirring with a wooden spoon or using a dough hook until a soft dough is achieved.
- Pro Tip: The dough should feel slightly sticky but still easy to work with.
3. Knead the Dough
- Transfer the dough to a lightly floured surface.
- Knead for about 8-10 minutes until smooth and elastic.
- Alternative: Use a stand mixer with a dough hook for 5-6 minutes.
- Incorporate additional grains or seeds if desired for extra texture.
4. First Proofing
- Form the dough into a ball and place it in a bowl that has been greased.
- Cover with a clean kitchen towel or plastic wrap.
- Let it rise in a warm area for 1-2 hours, or until it doubles in size.
- Tip: If your kitchen is cold, place the dough in an oven preheated to 100°F (37°C) and then turned off.
5. Shape the Loaf
- Punch down the dough to release air bubbles.
- Shape the dough into a loaf or individual rolls according to your choice.
- For rolls, divide the dough into equal portions and shape each piece into a round ball.
- Place the formed dough in a greased loaf pan or on a baking sheet.
6. Second Proofing
- Cover the loaf or rolls and allow them to rise for 30 to 45 minutes.
- Meanwhile, preheat your oven to 375°F (190°C).
7. Bake the Bread
- Place the bread in the oven and bake for 30-35 minutes for a loaf or 20-25 minutes for rolls.
- The finished bread should have a golden-brown crust and produce a hollow sound when tapped.
- Test with a kitchen thermometer; the internal temperature should reach 190°F (88°C).
8. Cool and Finish
- Remove the bread from the oven and let it cool on a wire rack.
- Brush the top with honey for a glossy finish and extra flavor.
Troubleshooting Common Issues
- Dense Bread: Check that your yeast was active and the dough was kneaded sufficiently.
- Cracked Crust: Ensure proper proofing to prevent uneven expansion during baking.
- Sticky Dough: Add flour in small increments while kneading, but don’t overdo it.
This method guarantees a delightful honey grain bread recipe every time, with its soft, moist texture and irresistible aroma.
Expert Tips and Tricks
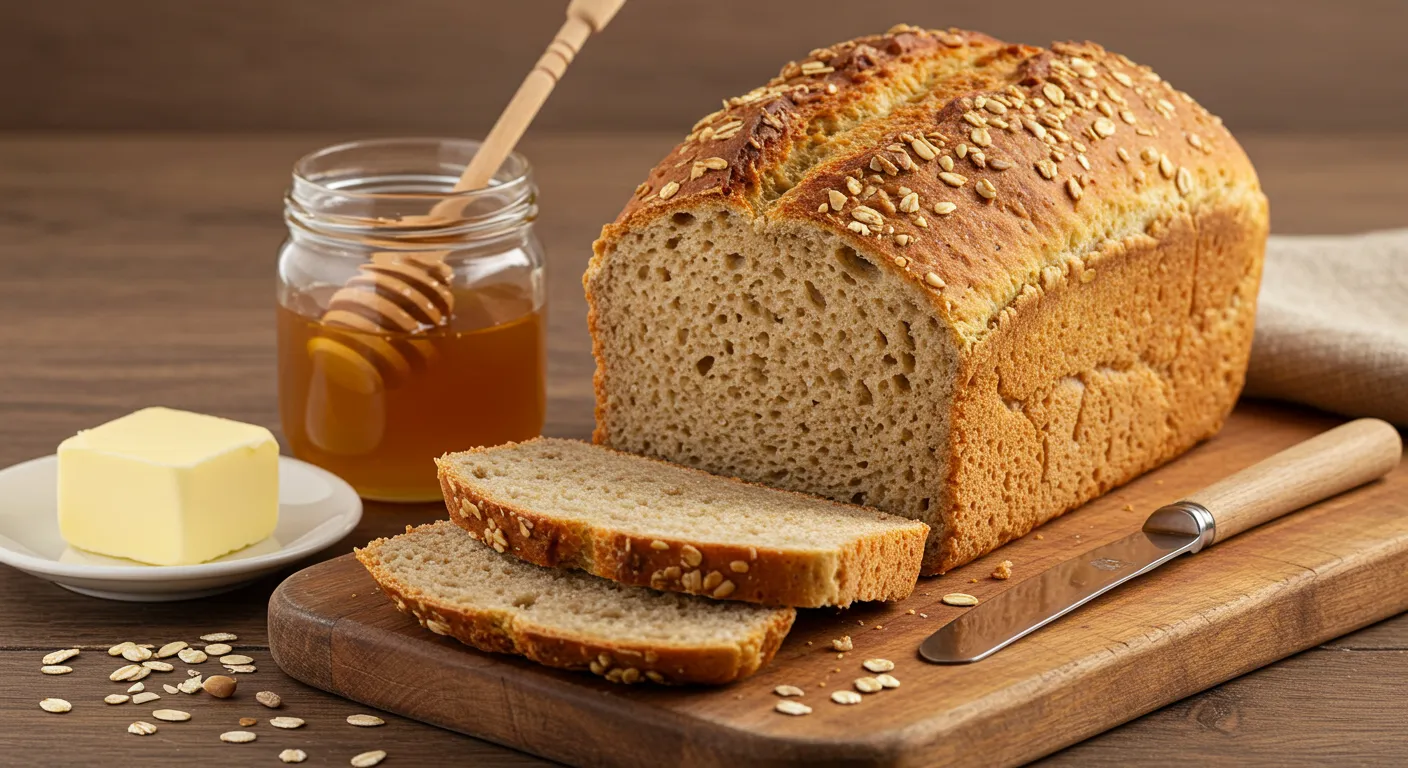
To make your honey grain bread recipe even more exceptional, here are some professional baker insights and helpful tips:
1. Use Quality Honey
For a truly flavorful honey grain bread, the type of honey you use can make a big difference. Opt for raw, local honey for the best natural sweetness and rich flavor. This not only enhances the bread’s taste but also adds subtle floral notes.
2. Experiment with Different Grains
The beauty of the honey wheat bread recipe lies in its versatility. While whole wheat flour provides a nutty flavor, you can easily incorporate other grains like barley, oats, or quinoa for a multi-grain delight. Adding seeds, such as sunflower or flax, will introduce extra texture and health benefits.
3. Don’t Overmix the Dough
When preparing your honey bread recipe, be careful not to overwork the dough during kneading. Overmixing can lead to a tough loaf, so knead just until the dough becomes smooth and elastic. If you’re using a stand mixer, keep the speed low to avoid overworking the dough.
4. Adjust the Sweetness
If you prefer a sweeter honey grain bread recipe, consider adding more honey to the dough, but be cautious. Adding too much can alter the texture and affect how the bread rises. A tablespoon or two extra should suffice for a nice balance of sweetness.
5. Baking and Storage Tips
For a soft, golden crust, brush the top of the dough with a little melted butter or honey right before baking. After baking, allow the bread to cool completely before slicing to avoid a doughy center.
When storing your honey wheat bread recipe, keep it in an airtight container at room temperature for 2-3 days. For longer storage, freeze the bread, slicing it before freezing so you can easily grab just the amount you need.
Make-Ahead Instructions
If you’re planning to enjoy this honey grain bread recipe for a special event or gathering, you can prepare the dough in advance. After the first proofing, cover the dough tightly with plastic wrap and refrigerate it overnight. In the morning, simply shape and proof the dough again before baking.
With these expert tips, your honey wheat bread recipe will be a success every time. This deliciously soft bread is perfect for breakfast, snacks, or as a side to any meal.
Variations and Customizations
The honey grain bread recipe is incredibly versatile, allowing you to customize it to suit your tastes or dietary needs. Here are some fun variations and customizations to try:
1. Add Dried Fruit and Nuts
For a twist on the traditional honey wheat bread recipe, try adding dried fruits like cranberries, raisins, or apricots, along with a handful of nuts such as walnuts or almonds. These additions will introduce a delightful sweetness and crunch to your bread.
2. Make It Gluten-Free
If you’re following a gluten-free diet, you can adapt this honey bread recipe by substituting the all-purpose and whole wheat flours with a gluten-free flour blend. Be sure to also add a bit of xanthan gum or guar gum to help with the texture and elasticity of the bread. The honey will still provide that sweet, natural flavor.
3. Vegan Version
For a vegan-friendly version of this honey grain bread recipe, replace honey with maple syrup or agave nectar. Use plant-based milk, such as almond or oat milk, in place of dairy milk. Also, swap the butter with vegan margarine or coconut oil for a dairy-free loaf.
4. Flavored Honey Options
To infuse even more flavor into your honey wheat bread recipe, experiment with different types of honey. Try lavender honey for a floral note, or cinnamon honey for a warm, spicy kick. These subtle changes can elevate your bread, making it even more unique.
5. Shape Variations
While this honey bread recipe is great as a loaf, consider shaping it into rolls or even braids for an eye-catching presentation. The dough can be divided into smaller portions and baked as individual dinner rolls, perfect for gatherings or family meals.
6. Add Seeds or Grains
For an added crunch, top your honey grain bread with sunflower seeds, chia seeds, or rolled oats before baking. You can also knead grains like quinoa or bulgur directly into the dough to enhance the texture and nutritional value.
With these variations, you can tailor the honey grain bread recipe to suit your preferences or dietary restrictions, all while maintaining its deliciously sweet and wholesome character.
Serving and Presentation
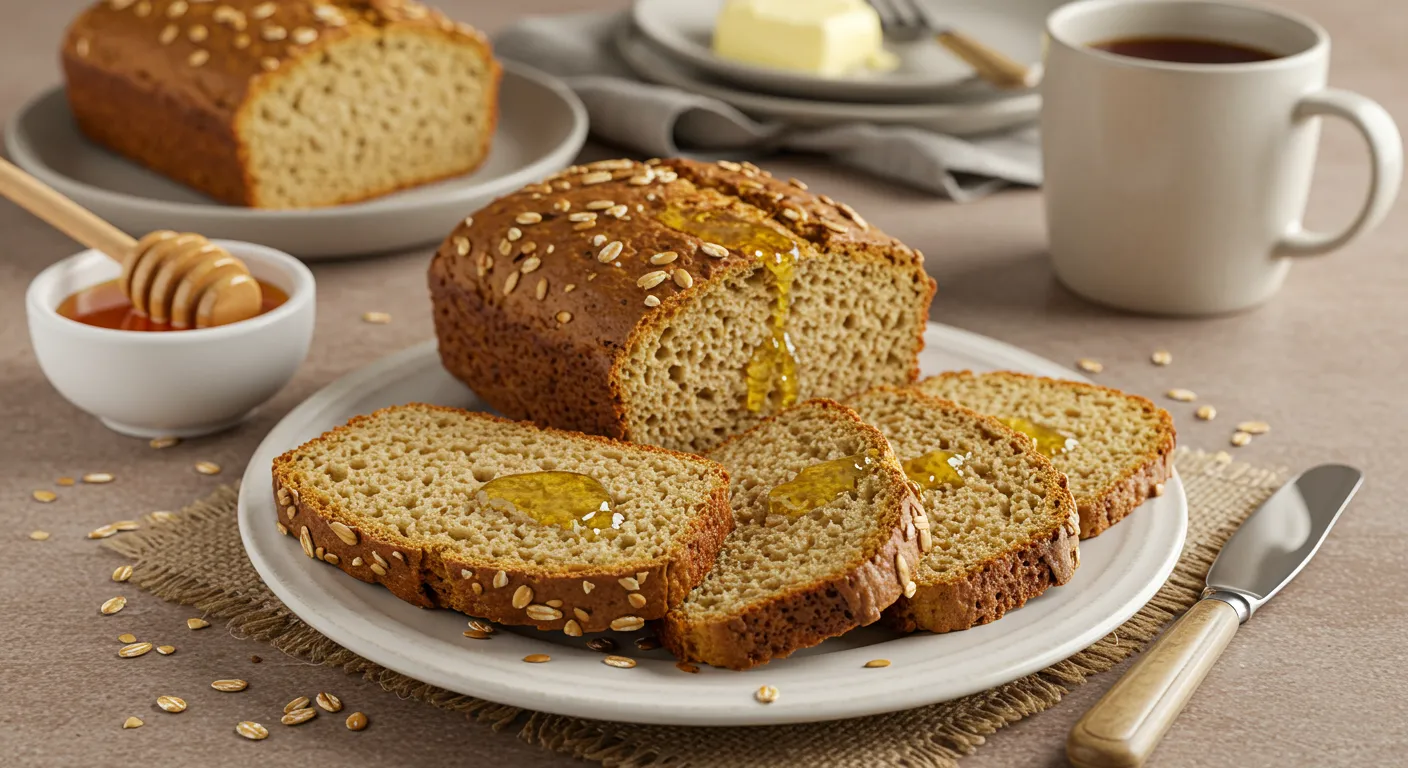
Once your honey grain bread recipe is baked and cooled, it’s time to serve and enjoy! Here are some creative and delicious ideas for serving and presenting this comforting bread:
1. Serve with Spreads
One of the best ways to enjoy honey wheat bread recipe is by pairing it with your favorite spreads. Try butter or a drizzle of honey for a simple treat. For something more indulgent, serve it with cream cheese, peanut butter, or Nutella. The slightly sweet flavor of the bread pairs perfectly with both savory and sweet spreads.
2. Toast It for Breakfast
Honey grain bread makes an excellent base for a delicious breakfast. Slice the bread and toast it lightly. Top with your favorite jam or preserve, fresh fruit, or a sprinkle of cinnamon and sugar for an extra-special treat to start your day. The warm, crispy texture with the sweet honey flavor will give you that perfect morning boost.
3. Pair with Soup or Salad
Honey wheat bread recipe makes a great accompaniment to soups or salads. The soft texture and mild sweetness balance out hearty soups like butternut squash or tomato basil. For salads, use slices of the bread as a side or even as croutons to add a touch of sweetness and crunch.
4. Serve at Special Occasions
This honey bread recipe is perfect for holidays, gatherings, or special occasions. Shape the dough into individual rolls for a beautiful presentation at a dinner party or holiday feast. The golden crust and soft, sweet interior will impress your guests.
5. Make it a Gift
This honey grain bread recipe also makes for a lovely homemade gift. Wrap a fresh loaf or a few rolls in parchment paper and tie it with twine for a rustic, charming presentation. It’s a thoughtful and personal gift for birthdays, holidays, or housewarmings.
6. Photography Tips
If you’re sharing your honey wheat bread recipe on social media, consider these tips for beautiful photos:
- Place the bread on a wooden cutting board or a neutral-colored plate to highlight the golden crust.
- A sprinkle of oats or seeds on top of the loaf adds a rustic, visually appealing touch.
- Capture the bread being sliced, with the light steam rising to showcase its soft, fluffy texture.
- Natural light works best for food photography—try to photograph your bread near a window for the best effect.
With these serving and presentation ideas, your honey grain bread will be as delightful to the eyes as it is to the taste buds. Whether you’re serving it at a special event or enjoying it with a cup of tea, this bread will quickly become a favorite in your home.
Conclusion
Making a honey grain bread recipe is a fantastic way to enjoy a sweet, nutritious homemade treat that’s perfect for any occasion. Whether you’re enjoying it fresh out of the oven or toasting it for breakfast, the soft, slightly sweet texture combined with the earthy grains makes this bread truly irresistible. The process of making honey bread is simple, and with the tips and tricks provided, you’re sure to get perfect results every time.
If you’re looking for a twist, try the honey wheat bread recipe for an extra dose of fiber or use coconut milk to add richness to your loaf. No matter how you make it, the honey grain bread is sure to be a family favorite. So, grab your ingredients, follow the easy steps, and enjoy the delightful results of this comforting, homemade bread!
FAQ Section
Here are some frequently asked questions about making honey grain bread and tips to ensure your baking experience is as smooth as possible:
1. Can I use a different type of flour in the honey grain bread recipe?
Yes, you can experiment with different types of flour in the honey grain bread recipe. For a gluten-free version, you can use a gluten-free all-purpose flour blend. However, note that the texture may vary slightly, so additional adjustments to liquid or rising time may be necessary. For a denser loaf, you can also try using whole wheat flour in place of some of the all-purpose flour.
2. Can I use brown sugar instead of honey for the honey bread recipe?
While honey bread recipe calls for honey, you can substitute brown sugar if needed. However, using honey adds a natural sweetness and moisture to the bread that sugar can’t replicate. If you choose to use brown sugar, you may need to adjust the liquid content to maintain the right dough consistency.
3. How do I store homemade honey wheat bread to keep it fresh?
To keep your honey wheat bread recipe fresh, store it in an airtight container or wrap it tightly in plastic wrap. Keep it in a cool, dry place for up to 3-4 days. For longer storage, slice the bread and freeze it in a freezer-safe bag for up to 3 months. To thaw, simply leave it at room temperature or toast it for a quick snack.
4. Can I make this bread using a bread machine?
Yes! You can adapt the honey grain bread recipe for a bread machine. Simply add the ingredients to the bread machine in the order recommended by the manufacturer. Select the “dough” or “basic bread” setting, and the machine will do the rest. Once the dough has risen, you can shape it and bake it in the oven for the perfect homemade bread.
5. How do I make a honey wheat bread loaf with coconut milk?
To make a honey wheat bread recipe with coconut milk, simply replace the milk in the recipe with coconut milk. This will give the bread a subtle coconut flavor and slightly richer texture. You may also want to reduce the amount of honey slightly to balance the sweetness of the coconut milk.
6. Can I add nuts or seeds to the honey bread recipe?
Absolutely! Adding nuts, such as walnuts or pecans, or seeds like sunflower seeds or flaxseeds can give the honey wheat bread a delightful crunch and extra flavor. Simply fold them into the dough before the final rise, or sprinkle them on top before baking for a decorative finish.
These FAQs should help you with any uncertainties you may have about making the honey grain bread recipe. Whether you’re looking to modify it or need help with storage, these tips ensure your bread turns out perfect every time.

