Imagine satisfying your sweet tooth with a warm, gooey dessert that takes less than five minutes to prepare. Learning how to make Oreo mug cake is the ultimate hack for dessert lovers who crave indulgence without the hassle. This easy treat combines crushed Oreos and milk to create a rich and decadent cake that’s perfect for any occasion—or even a late-night snack.
The beauty of this Oreo microwave cake lies in its simplicity. Whether you’re short on time or just want a quick dessert fix, this 2-ingredient Oreo mug cake is your go-to recipe. Plus, it’s made with ingredients you likely already have at home.
In this article, we’ll guide you through every step to ensure your Oreo and milk in microwave creation turns out perfectly every single time. Get ready to delight your taste buds with this effortless and satisfying dessert!
Quick Recipe Card
Prep Time: 2 minutes
Cook Time: 1 minute
Total Time: 3 minutes
Difficulty Level: Super Easy
Servings: 1 mug cake
Nutritional Information (Approximate):
- Calories: 220
- Carbohydrates: 35g
- Protein: 3g
- Fat: 10g
Equipment Needed
- A microwave-safe mug
- Fork or spoon for mixing
- Microwave
Ingredients
- 4 Oreos (classic or flavored)
- 3 tablespoons milk
Instructions
- Place the Oreos in a microwave-safe mug.
- Pour in the milk and let it soak for 30 seconds.
- Use a fork to mash the Oreos and milk into a smooth batter.
- Microwave the mug on high for 60–75 seconds.
- Let it cool slightly before enjoying your warm, delicious Oreo microwave cake!
This 2-ingredient Oreo mug cake is as simple as it gets. Whether you’re using Oreo and milk in microwave as a quick snack hack or to satisfy a sudden dessert craving, this recipe never disappoints.
Ingredient Deep Dive
A successful Oreo mug cake relies on just two ingredients, making it a favorite for anyone seeking a fast, no-fuss dessert. Let’s explore the essentials:
Oreos
- Classic Oreos work perfectly, but feel free to experiment with other flavors like Double Stuf, Golden, or Mint. Each variety adds its own twist to the mug cake.
- The cookies are the star ingredient, providing the structure, sweetness, and iconic chocolatey flavor.
- Pro Tip: Crush your Oreos finely to ensure a smoother batter and fluffier cake texture.
Milk
- Whole milk is recommended for a richer, creamier result. However, low-fat, plant-based options like almond or oat milk can be used for dietary preferences.
- The milk hydrates the crushed Oreos, transforming them into a batter that cooks into a cake-like consistency.
Ingredient Substitutions
- Oreos: Want a healthier option? Try sugar-free cookies or gluten-free sandwich cookies.
- Milk: If you’re out of milk, water can work in a pinch, though it may result in a slightly less rich texture.
Additional Toppings
Elevate your Oreo microwave cake with these toppings:
- Whipped cream or ice cream for a creamy contrast.
- Crushed Oreos for extra crunch.
- A drizzle of chocolate syrup or caramel for added decadence.
Equipment Needed
To create the perfect Oreo mug cake, you don’t need a fully equipped kitchen. This recipe is all about simplicity and accessibility. Here’s what you’ll need:
- A Microwave-Safe Mug
- Choose a mug that holds at least 12 ounces to avoid spills during cooking.
- Ceramic mugs work best for even heating.
- A Spoon or Fork
- Use this to crush the Oreos into fine crumbs and mix the batter smoothly.
- A Microwave
- Most standard microwaves will cook your mug cake in just 90 seconds or less.
- Measuring Tools (Optional)
- If you’re particular about ratios, a tablespoon can help measure the milk.
Optional Extras for Presentation
- A small bowl if you prefer to crush the Oreos before transferring to the mug.
- Decorative dishes or saucers if serving the cake as a plated dessert.
With your equipment ready, the process is straightforward and cleanup is minimal.
Step-by-Step Instructions
Creating the ultimate Oreo mug cake is as easy as 1-2-3! In just 5 minutes, you’ll have a delicious dessert to satisfy your sweet tooth. Here’s how to make it:
Step 1: Gather Your Ingredients
- Take 4-5 Oreos and place them in your microwave-safe mug.
- Add 3-4 tablespoons of milk to the mug. The milk softens the cookies, creating the perfect base for the cake. For a creamier texture, use whole milk.
Step 2: Crush and Mix
- Using a spoon or fork, crush the Oreos and milk together until you achieve a smooth, batter-like consistency. Make sure no large cookie chunks remain for even cooking.
Step 3: Microwave Your Cake
- Place the mug in the microwave and heat for 60–90 seconds on high. The batter will rise as it cooks, so keep an eye on it.
- Check for doneness by inserting a toothpick; if it comes out clean, your cake is ready.
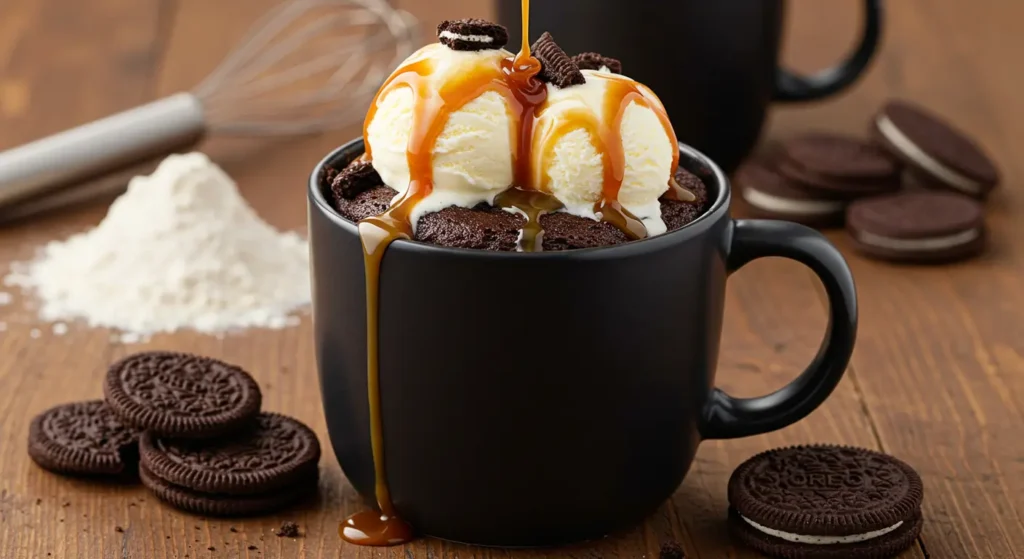
Step 4: Customize Your Cake
- Top your Oreo mug cake with whipped cream, a scoop of ice cream, or even crushed Oreos for added texture and flavor.
Step 5: Enjoy Your Creation
- Allow the cake to cool for a minute before digging in with a spoon. The rich and gooey texture pairs perfectly with a cold glass of milk.
Pro Tips for the Perfect Mug Cake
- Experiment with the 2-ingredient Oreo mug cake by adding a pinch of baking powder for extra fluffiness.
- If you prefer a chocolatey twist, drizzle some chocolate syrup on top.
- For a crunchier texture, microwave the Oreo and milk mixture for a shorter time and enjoy it slightly undercooked.
This simple recipe ensures a delightful dessert that tastes as if it came straight from the bakery.

Expert Tips and Tricks
Mastering how to make Oreo mug cake is a breeze with these simple tips.
1. Choose the Right Oreos
Classic Oreos and milk create a timeless flavor, but don’t hesitate to experiment with variations like Double Stuf or flavored Oreos to switch things up.
2. Achieve the Ideal Consistency
- Add milk gradually to achieve a batter-like texture. Too much milk can make the cake overly moist, while too little will result in a dense texture.
- The key to a perfect Oreo microwave cake is ensuring all cookie chunks are thoroughly crushed for a smooth batter.
3. Customize Your Recipe
- For a richer dessert, mix in a tablespoon of chocolate chips or a teaspoon of cocoa powder before microwaving.
- Make your 2-ingredient Oreo mug cake even more indulgent by adding a dollop of Nutella or peanut butter to the center.
4. Perfect Microwave Timing
- Cooking times can vary based on microwave wattage. Start with 60 seconds, then add increments of 10 seconds until the cake is fully cooked.
- Keep an eye on your Oreo and milk in microwave as the cake rises—it’s part of the fun!
Variations and Customizations
One of the best things about learning how to make Oreo mug cake is the endless possibilities for customization. While the classic version with Oreos and milk is a hit, you can take it up a notch with a few creative twists:
- Add a Chocolate Center: Drop a square of milk chocolate or dark chocolate in the middle of the batter before microwaving. When you dig in, you’ll get a gooey molten center.
- Mix in Nutella or Peanut Butter: Swirl a teaspoon of Nutella or peanut butter into the batter for an extra layer of indulgence.
- Top with Whipped Cream: Once your cake is ready, a dollop of whipped cream can add a creamy touch. Sprinkle crushed Oreos or chocolate shavings for added flair.
- Make It Minty: Use mint-flavored Oreos for a refreshing twist. This variation pairs perfectly with a drizzle of melted chocolate.
- Turn It Fruity: Add diced strawberries or bananas as a topping to balance the richness of the cake. For a tropical touch, pair it with a scoop of coconut ice cream.
These variations not only enhance the flavor but also make this Oreo microwave cake a recipe you can revisit again and again without getting bored.
Serving and Presentation

Presentation is key when serving your Oreo and milk in the microwave creation. Here are some easy ideas to elevate your dessert:
- Toppings Galore: After the cake has cooled slightly, top it with vanilla ice cream, caramel sauce, or crushed cookies.
- Layered Elegance: Serve in a clear mug or glass to showcase the layers of the cake.
- Mini Party Desserts: Use smaller mugs to make individual portions for parties or gatherings. Decorate each with a unique topping for variety.
- Seasonal Decor: Add festive touches like sprinkles for birthdays or themed toppings for holidays.
- On the Go: Transfer the cake into a takeaway cup for a quick dessert to enjoy during busy days.
By paying attention to how you present your 2-ingredient Oreo mug cake, you can turn a simple dessert into a memorable treat.
Conclusion
In just a few minutes, you can transform basic ingredients like Oreos and milk into a decadent dessert that rivals bakery-quality treats. Whether you’re following the classic Oreo mug cake recipe or exploring variations like adding Nutella or using mint Oreos, the results are guaranteed to impress. This quick and easy recipe is proof that simplicity doesn’t mean compromising on flavor.
Next time you’re craving something sweet, try this 2-ingredient Oreo mug cake recipe. It’s perfect for satisfying your dessert cravings without spending hours in the kitchen. Make one today and experience the magic of turning cookies into cake!
FAQ Section
1. Can I use plant-based milk for this recipe?
Absolutely! Almond milk, oat milk, or soy milk can be used as substitutes for regular milk when making your Oreo mug cake.
2. What size mug should I use?
A standard 12-ounce mug is ideal. This ensures the cake has enough room to rise without overflowing in the microwave.
3. How do I prevent the cake from becoming dry?
Avoid overcooking! Check your Oreo microwave cake after 60 seconds and add 10-second increments if needed. The cake should be moist but cooked through.
4. Can I make this in an oven instead?
Yes, bake your Oreo and milk mixture in an oven-safe ramekin at 350°F (175°C) for 10-12 minutes.
5. Is this recipe suitable for kids?
Definitely! Kids will love making this 2-ingredient Oreo mug cake. Supervise them while microwaving, and let them have fun customizing their creations.